Below is a step-by-step guide for setting up and using Wonderchat’s voice calling integration, including how to create a dedicated phone number, test calls within your browser, and ensure proper audio permissions.
Overview
Wonderchat Calls let you connect a unique, US-based phone number to your Wonderchat bot, allowing users to call and interact with your AI assistant via voice. Once configured, you can easily test your setup directly from your web browser before sharing the number with customers.
Prerequisites
- A Wonderchat account with an active bot.
- A supported web browser (e.g., Chrome, Firefox) with a working microphone.
- Proper permissions enabled for microphone access within your browser.
Steps to Set Up Wonderchat Calls
- Open Your Wonderchat Dashboard
Log in to your Wonderchat account and navigate to the main dashboard, where you will see a list of your bots.

- Initiate the Phone Integration
Next to the bot you want to enable calling for, locate the phone integration icon.
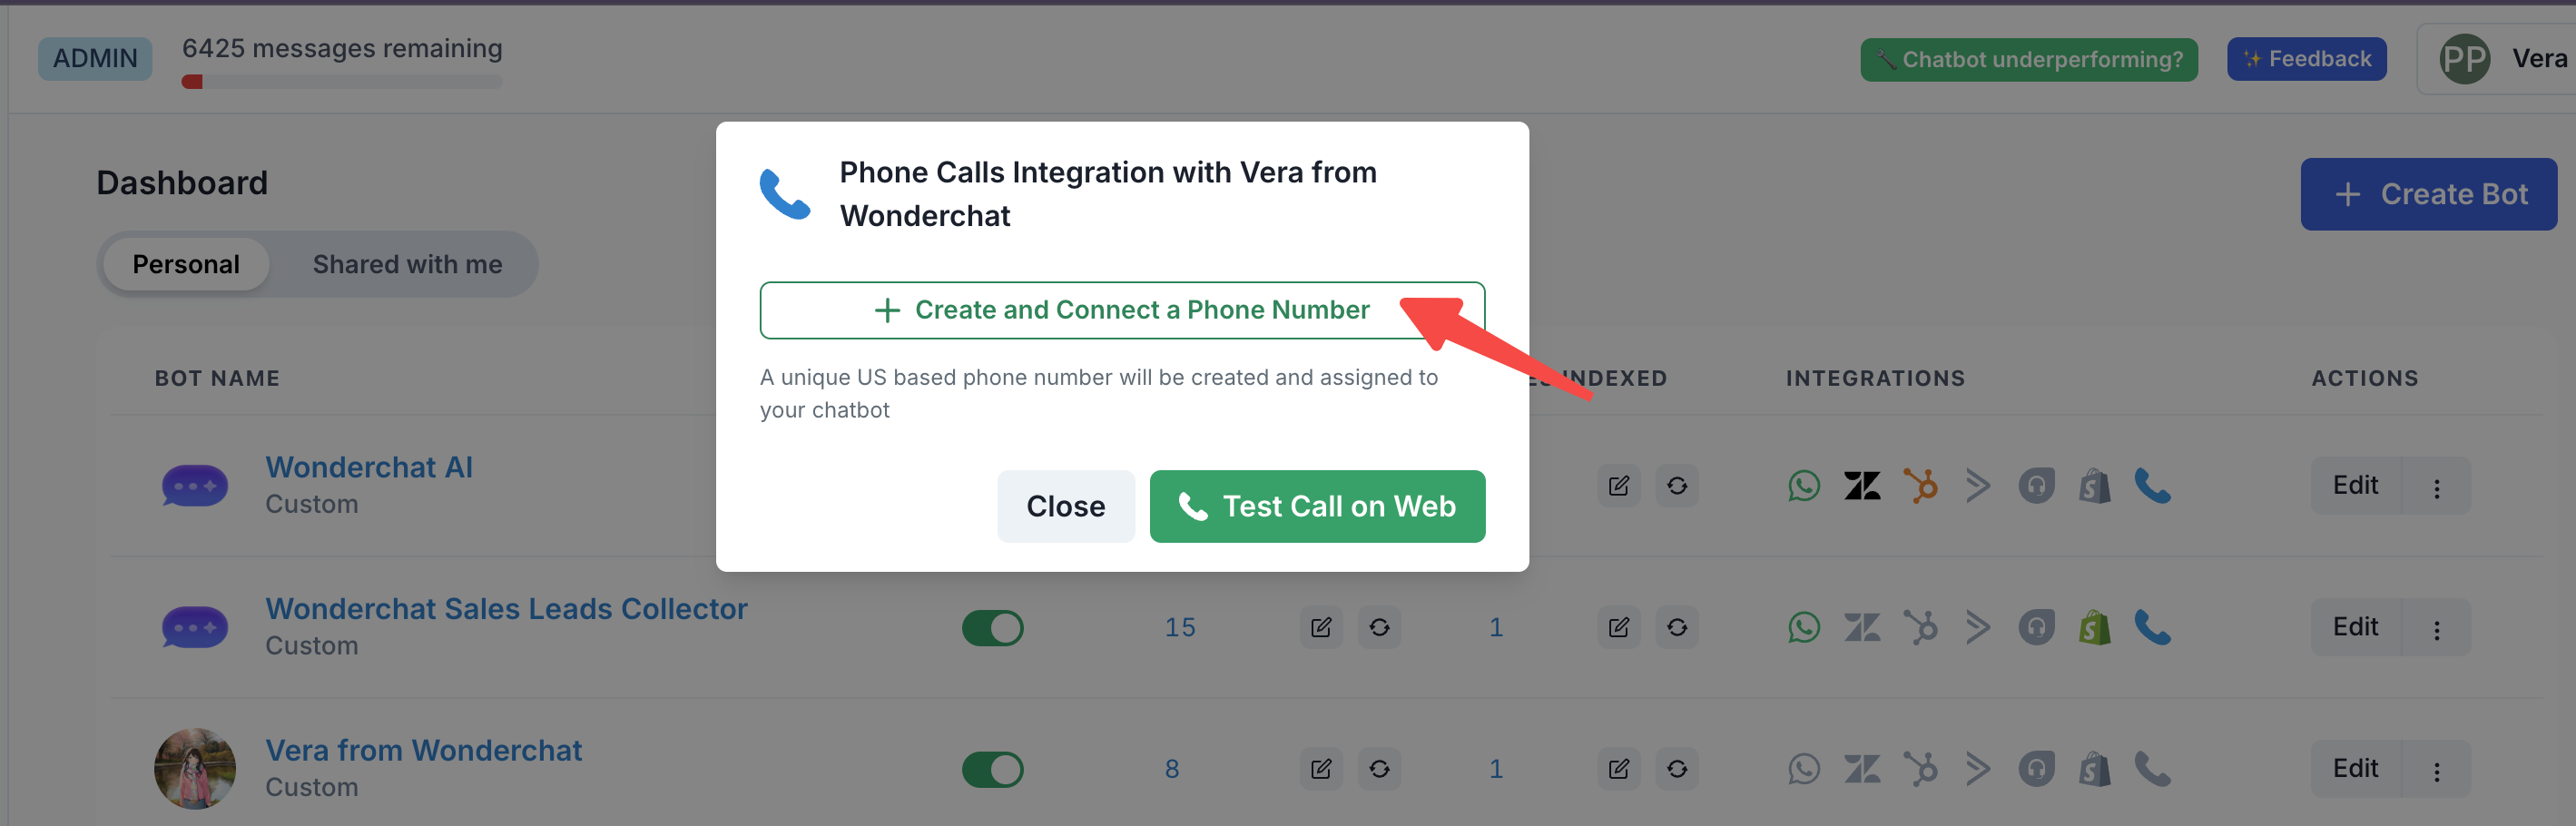
- Click the Create and Connect a Phone Number button.
- Wonderchat will automatically generate a unique US-based phone number and associate it with your selected bot.
- Confirm Phone Number Activation
Once created, a confirmation message will appear, showing the newly assigned phone number alongside a green checkmark. This indicates that the number is active and ready to receive calls.
Example: (254) 274-XXXX ✔️
Testing Calls on the Web
Before sharing your phone number with users, it’s recommended to test the call flow within your browser. To do this:
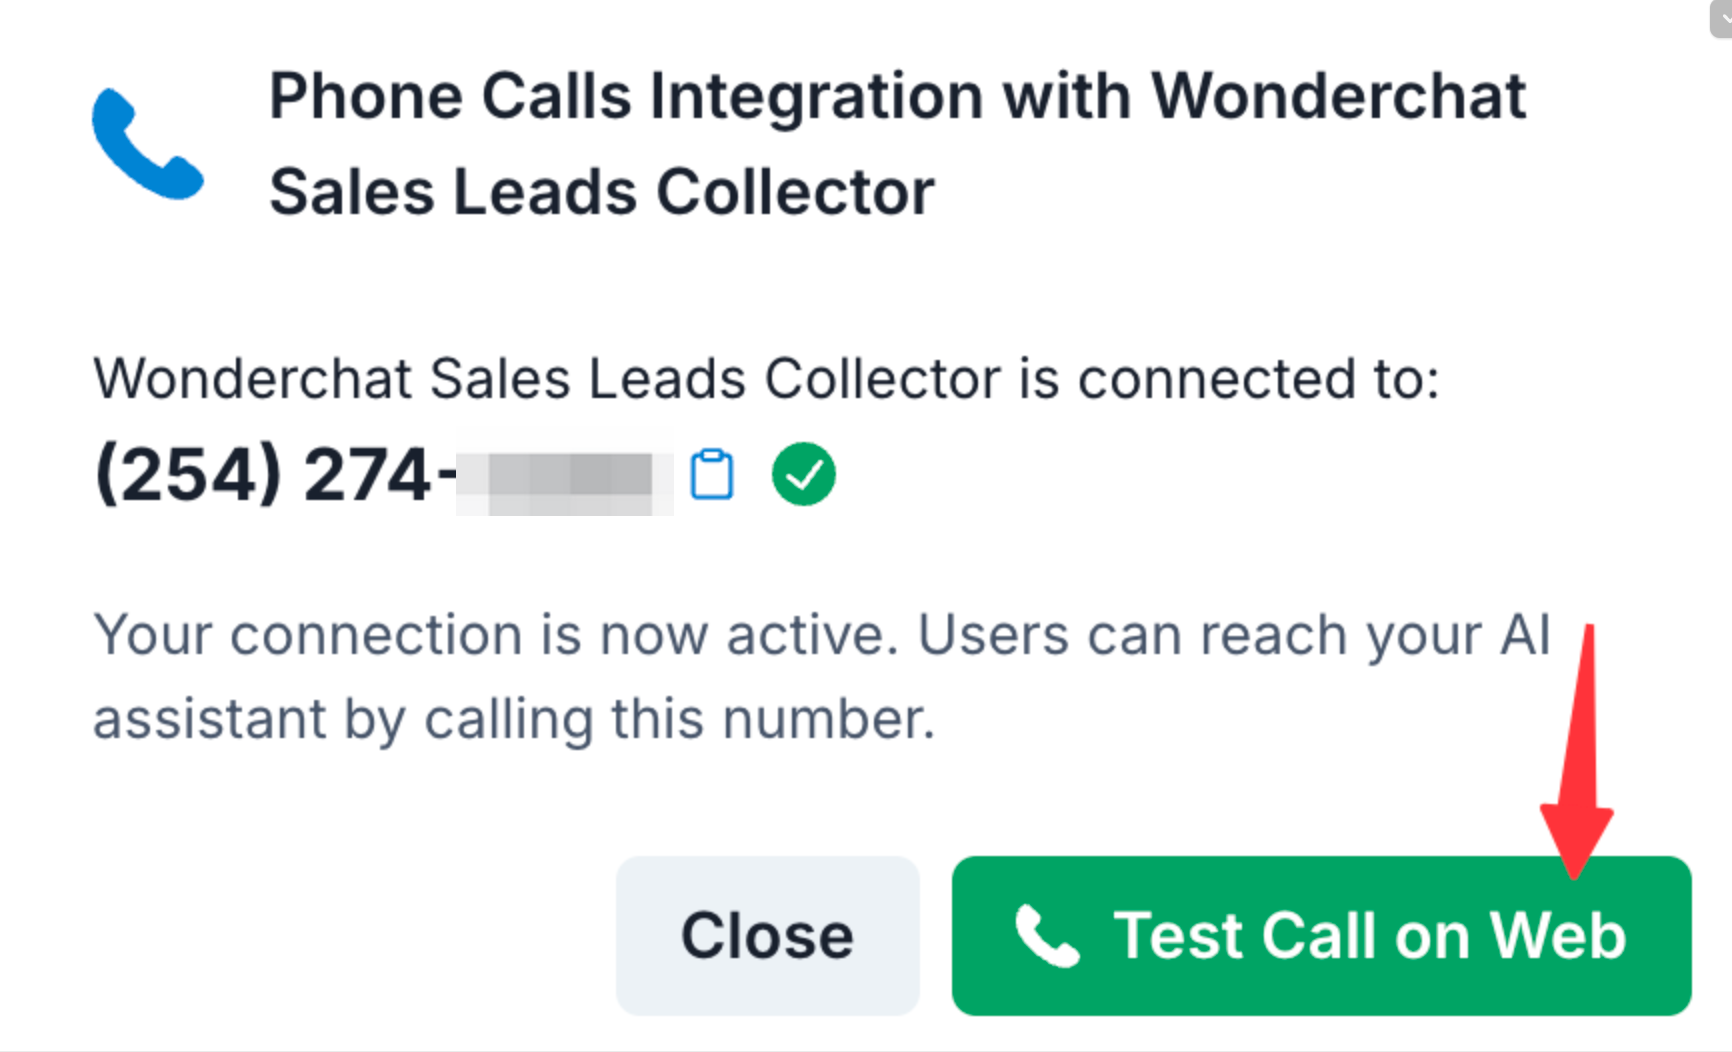
- Click the “Test Call on Web” Button
After you’ve created and connected your phone number, you’ll see a Test Call on Web button in the integration popup. Click this to open the test call window.
- Enable Your Microphone
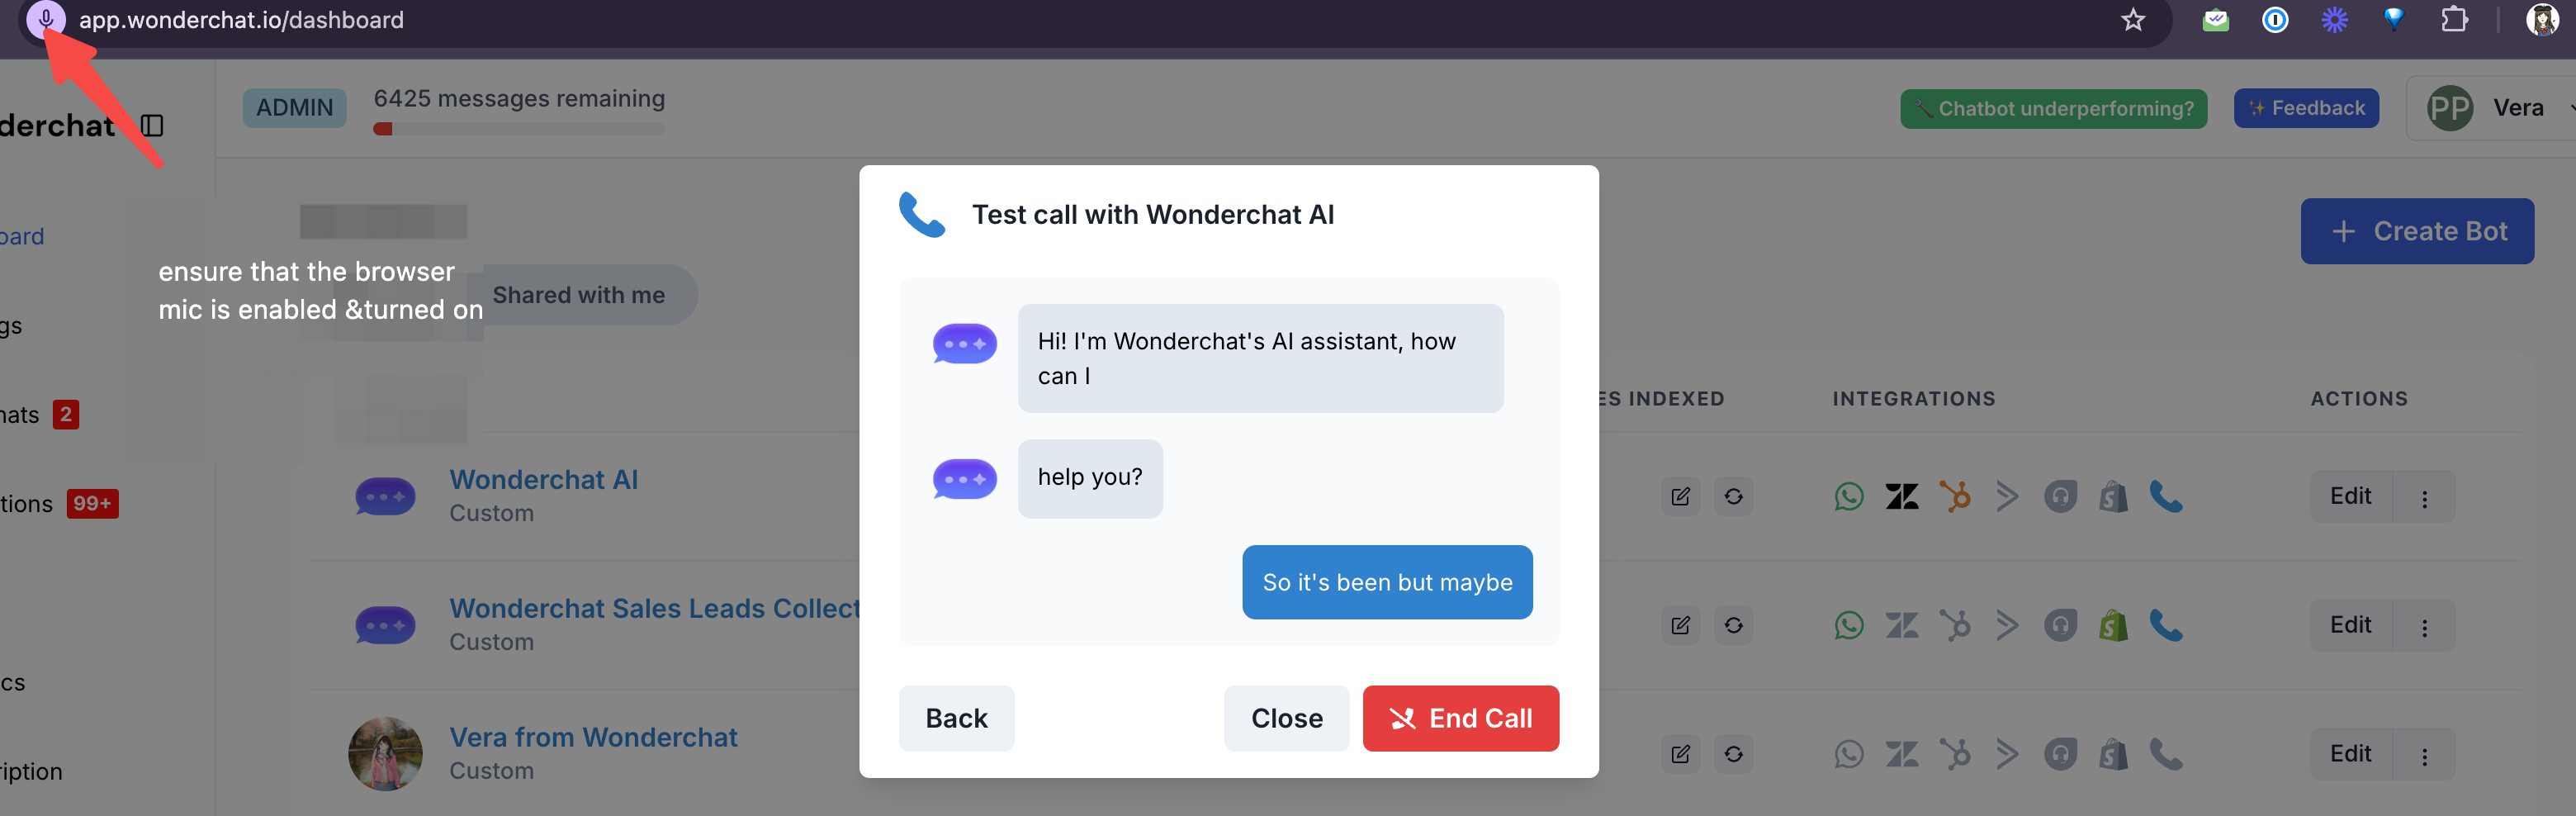
Your browser may prompt you to allow microphone access. Ensure that:
- You grant permission for the site to access your microphone.
- Your microphone is enabled and unmuted.
You should see a small microphone icon in the browser’s address bar, indicating that audio input is active.
- Interact with the AI Assistant
Once the test call window is open, you’ll see a chat-like interface.
- Speak naturally into your microphone.
- The assistant’s speech recognition will convert your spoken words into on-screen text.
- The Wonderchat bot will respond to you as it would in a normal text-based chat scenario.
- Check Transcription and Responses
During the test call, the AI will respond with text as you speak. If the assistant cannot understand you (e.g., background noise or unclear speech), the transcription may show (inaudible speech). In such cases, try speaking more clearly or closer to the microphone.

- Ending the Test Call
Once you are done testing, you can end the call by clicking the End Call button. The test call window will close, and you can return to your dashboard.
Tips for Better Call Quality
- Use a Quality Microphone: A clear, well-positioned microphone improves speech recognition accuracy.
- Speak Clearly and at a Moderate Pace: This helps the AI assistant accurately transcribe and respond.
- Minimize Background Noise: Reduce ambient sounds for better voice detection and fewer misunderstandings.
- Check Browser Permissions: If audio isn’t working, ensure your browser allows microphone access and that no other application is blocking it.
Sharing the Phone Number
Once you have verified that your phone integration works correctly, you can share the assigned phone number with your users. They will then be able to call that number and interact with your Wonderchat bot by voice, as tested in your browser.
You are now ready to integrate Wonderchat calls into your user experience!