Wonder Inbox is a powerful new feature of WonderChat.io that allows you to connect your email inbox directly to your WonderChat bots. This feature enables the bot to assist you in drafting AI-generated email replies, streamlining your communication process and saving you time. Whether you're managing customer support, handling inquiries, or managing various email threads, Wonder Inbox integrates seamlessly to provide intelligent responses.
Setting Up Wonder Inbox
Follow the steps below to set up your email inbox with Wonder Inbox and start using AI-powered email drafting.
Step 1: Create an Email Alias
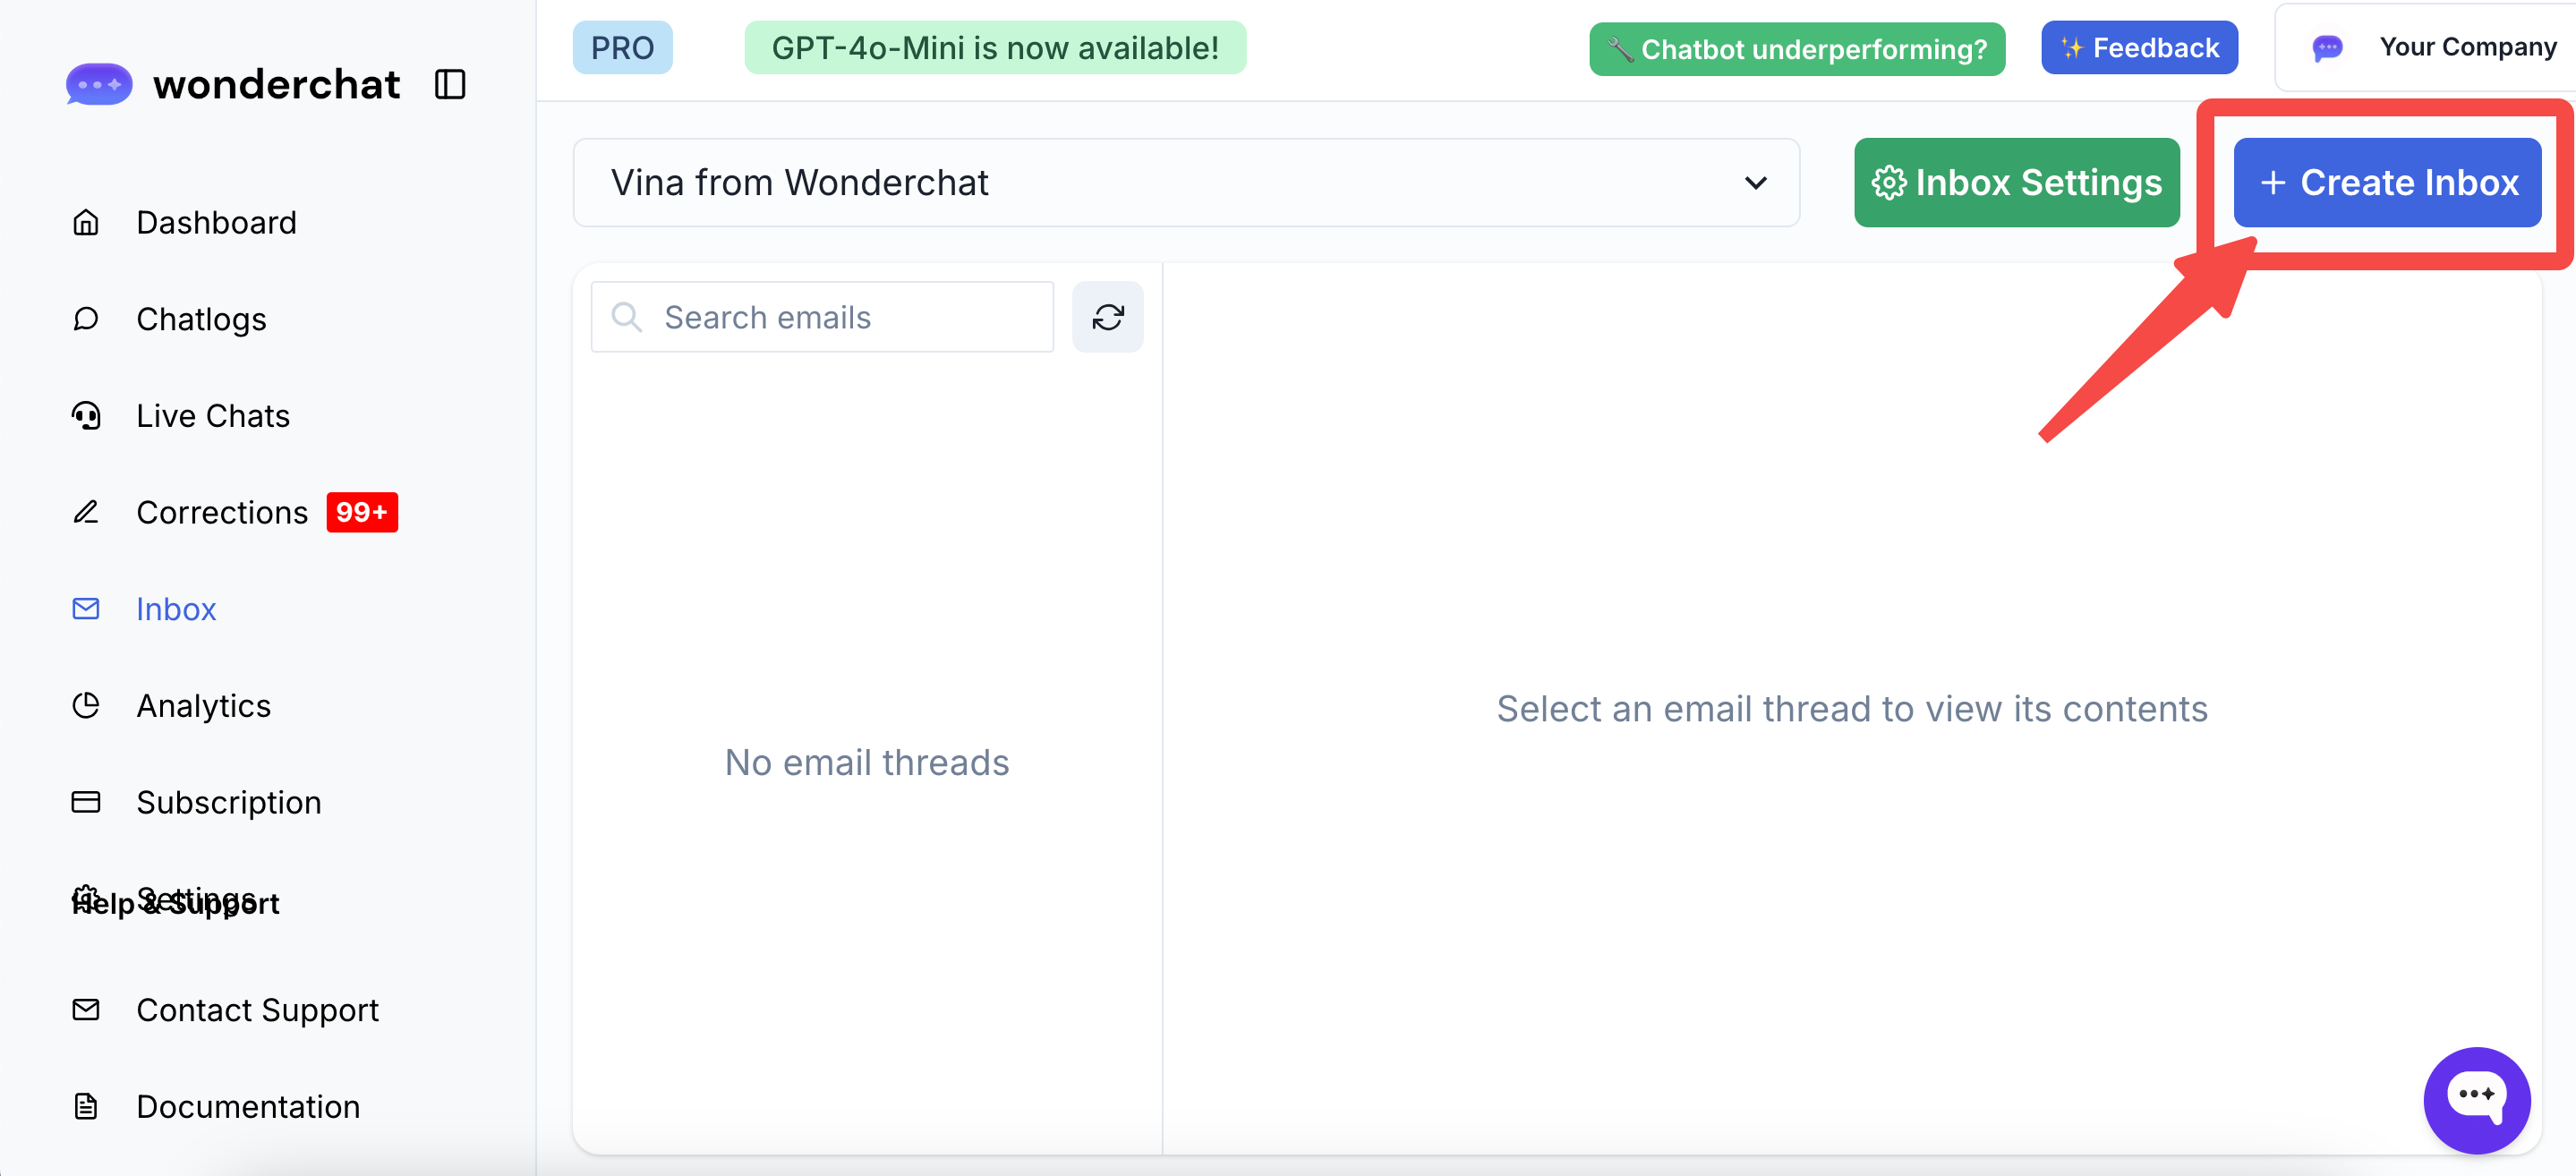
- Navigate to the Inbox Tab: Start by clicking on the "Create Inbox" button on your WonderChat dashboard.
- Set Up Your Email Alias:
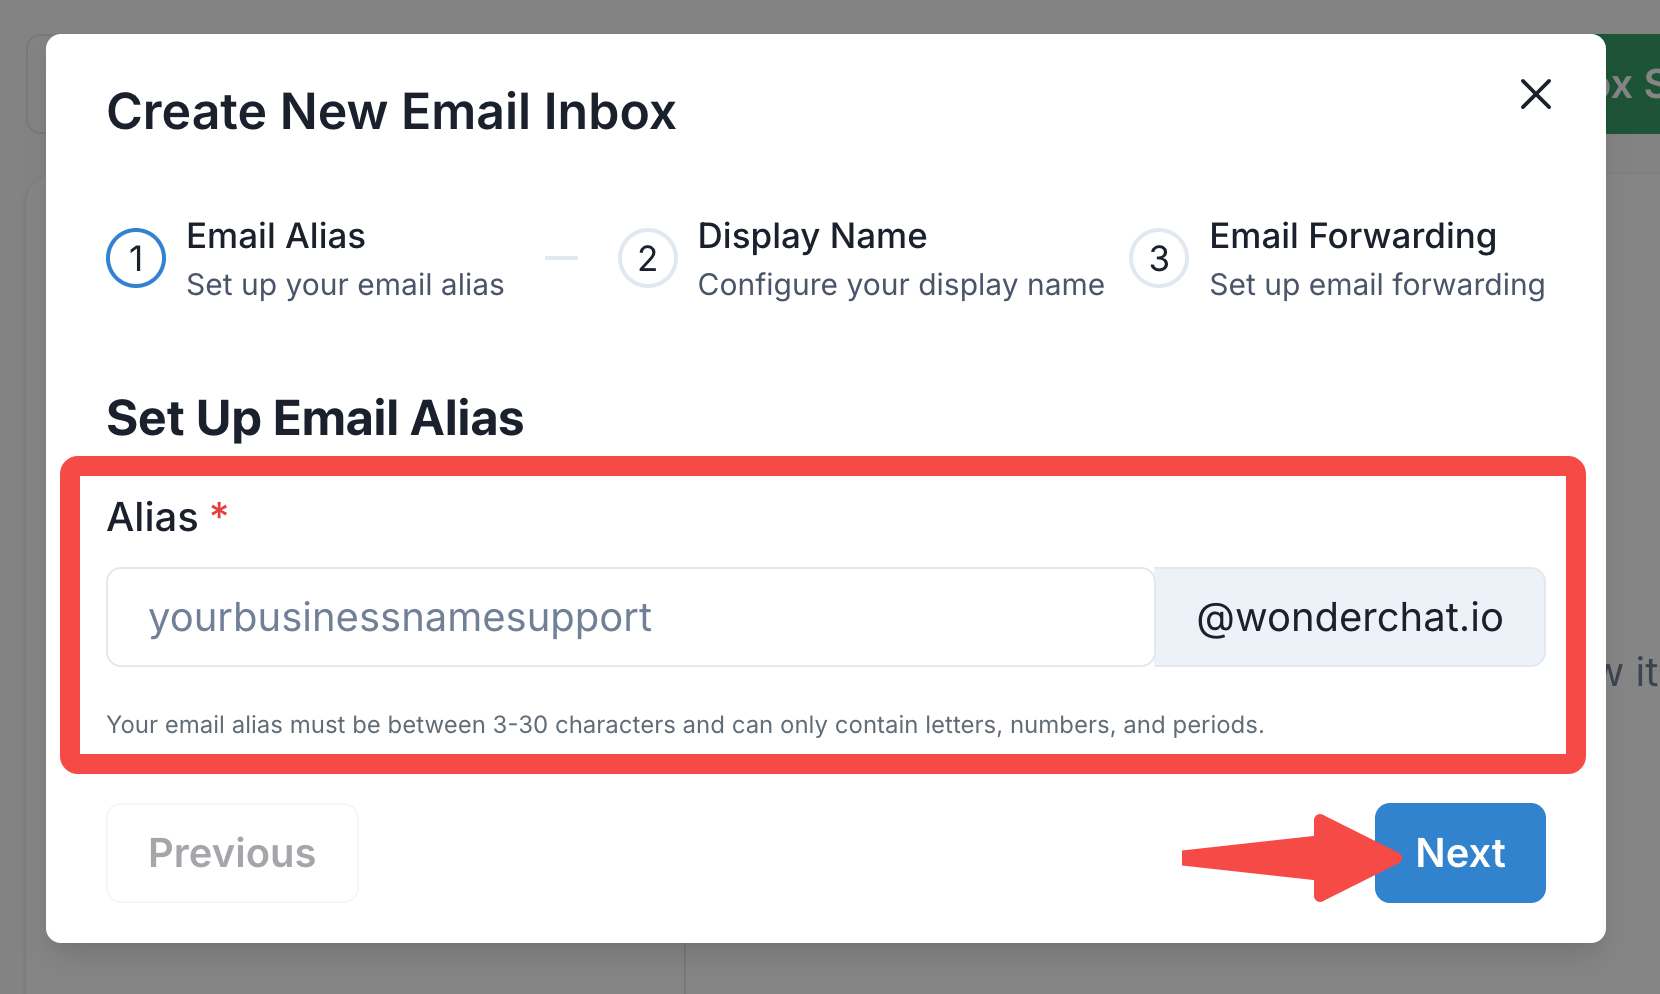
- Enter an email alias that you want to use for this inbox. The alias is the unique identifier that will be connected to your WonderChat bot.
- The alias must be between 3-30 characters and can only contain letters, numbers, and periods.
- Example:
yourbusinessnamesupport@wonderchat.io.
- The alias will be the email address that is used when you send out the email reply from your WonderChat Inbox.
- Proceed to the Next Step: Click "Next" to move forward.
Step 2: Configure Your Display Name

- Set Up Display Name:
- Enter the display name that will be associated with your email alias. This name will appear as the sender's name in the emails sent from this inbox.
- Example:
[Business Name] Support.
- Proceed to the Next Step: Once the display name is configured, click "Next."
Step 3: Set Up Email Forwarding
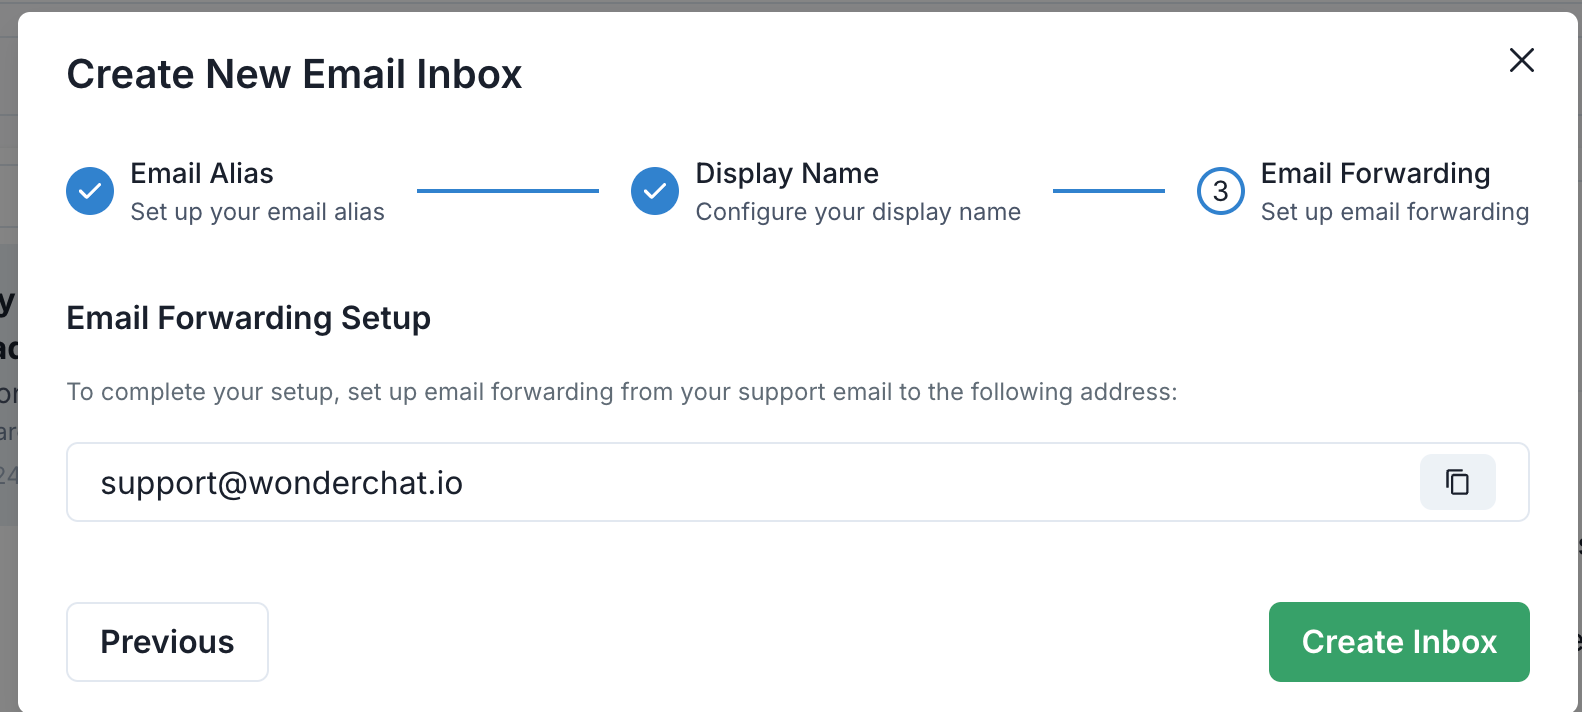
- Generate the Forwarding Address:
- The system will provide a unique forwarding address for your inbox, typically in the format
alias@wonderchat.io.
- Example:
support@wonderchat.io.
- The system will provide a unique forwarding address for your inbox, typically in the format
- Configure Forwarding in Your Email Provider:
- Go to your email provider (e.g., Gmail) and set up email forwarding to the Wonder Inbox address provided.
- For Gmail users:
- Go to Settings in your Gmail account.
- Navigate to the "Forwarding and POP/IMAP" tab.
- Click "Add a forwarding address" and enter the Wonder Inbox address.
- Follow the on-screen instructions to confirm the forwarding address.
- Once forwarding is set up, all emails sent to your original email address will be forwarded to your Wonder Inbox, where the WonderChat bot can assist in drafting replies.
Using Wonder Inbox
Once your inbox is set up, you can start using it to draft AI-generated replies.
- View Incoming Emails:
- Access your Wonder Inbox to view all forwarded emails.
- The inbox interface allows you to search, filter, and manage emails as needed.
- Draft Replies with AI:
- Select an email and click on "Draft reply with AI."
- Select the chatbot you wish to utilize to draft the email AI replies
- The WonderChat bot will generate a suggested reply based on the content of the email and your previous interactions.
- Review, edit, and send the reply directly from the Wonder Inbox.
Managing Multiple Inboxes
You can create and manage multiple inboxes with different aliases, allowing you to organize your communication channels efficiently. Each inbox can have its own settings and connected bot, tailored to the specific needs of your business.
Troubleshooting
- Email Forwarding Not Working: Double-check the forwarding settings in your email provider. Ensure that the Wonder Inbox forwarding address is correctly entered and confirmed.
- AI Reply Suggestions Not Relevant: Adjust the training data or settings for your WonderChat bot to improve the relevance of the AI-generated replies.
By following these steps, you can fully leverage the capabilities of Wonder Inbox, making your email management more efficient and your responses smarter.